Translate

Saturday, August 6, 2022

How to Block a Website on Windows xp, Windows 7 , Windows 10 &11 PC for all browser

 How to Block a Website on Windows xp, Windows 7 , Windows 10 &11 PC for all browser.

Step by Step Easy Process :

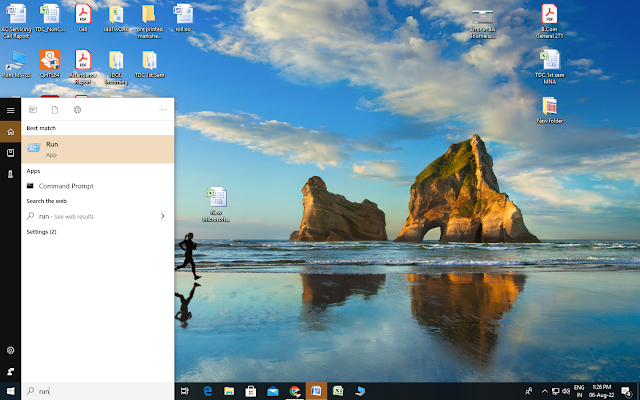
Step1.  Go to the Windows Start Button and click there. A "Search Program & Files" text box will appear at the bottom. On that Textbox type "run", and press enter key.

How to block a Website on Windows Local PC


Step 2. A small window dialog box will appear with a text box. On that text box write "system32" and press the enter key.

How to block a Website on Windows Local PC step 2


Step 3. Now on the screen you will see lots of Folders under this system32 directory. Find the "drivers" folder and double click on it.

How to block a Website on Windows Local PC


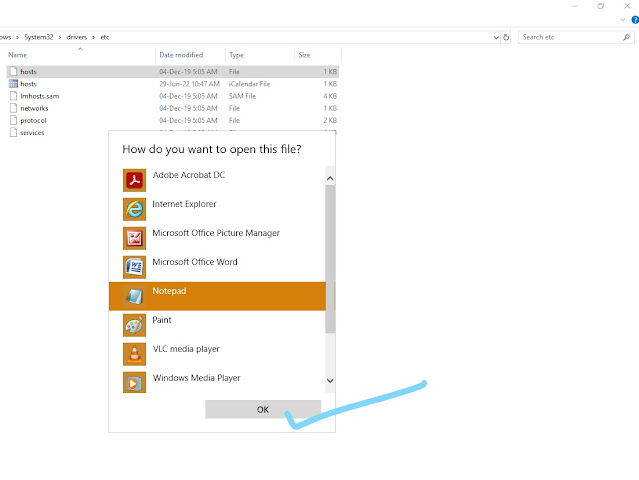
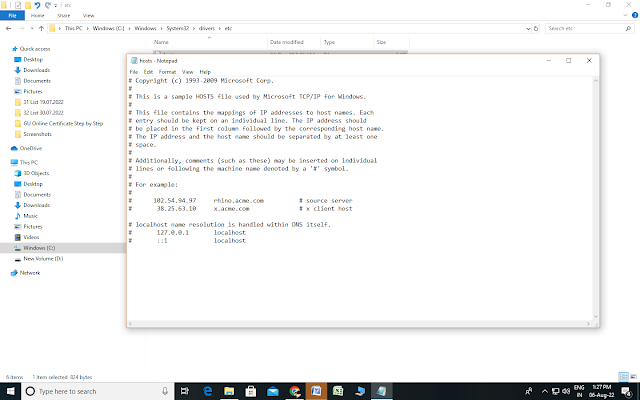
Step 4. On this "driver" folder you will get the "etc" folder. Double click on this folder and you will get a file called "host". Now open this "host" file in NotePad.


How to block a Website on Windows Local PC


# Copyright (c) 1993-2009 Microsoft Corp.
#
# This is a sample HOSTS file used by Microsoft TCP/IP for Windows.
#
# This file contains the mappings of IP addresses to host names. Each
# entry should be kept on an individual line. The IP address should
# be placed in the first column followed by the corresponding host name.
# The IP address and the host name should be separated by at least one
# space.
#
# Additionally, comments (such as these) may be inserted on individual
# lines or following the machine name denoted by a '#' symbol.
#
# For example:
#
#      102.54.94.97     rhino.acme.com          # source server
#       38.25.63.10     x.acme.com              # x client host

# localhost name resolution is handled within DNS itself.
#    127.0.0.1       localhost
#    ::1             localhost

-----------------------------------------------------------------------------------

Step 5. At the end of this text file write down the url which you want to block. For Example


How to block a Website on Windows Local PC


127.0.0.1     www.yahoo.com

127.0.0.1     www.google.com 


Step 6 . Save this notePad file. Now your www.yahoo.com and www.google.com sites will be blocked.
How to block a Website on Windows Local PC


Friday, July 29, 2022

How to Import Data (tables) from Postgresql to MS Access Database using ODBC : Step by Step Tutorial

 Import Data (tables) from Postgresql to MS Access Database using ODBC : Step by Step Tutorial for data migration from one Database System to Another Database System.

Objective :- Transfer data tables form PostgresSQL database to MS Access Database.

Step1:- Create a Blank MS Access Database in your Windows system.

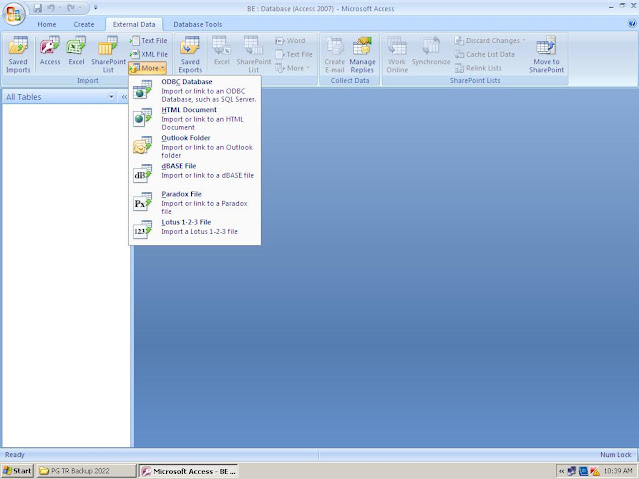
Step2:- Open that newly created Access database and go  the External Data tab. Next Click on the More button. Where you will find lots of options. Select the ODBC_databse form that list.


Import to ODBC Database

Step 2: Select the source and destination of data. Select the option "Import the Source Data into a new table in the current database", and click OK.


Step 2 : import the source data

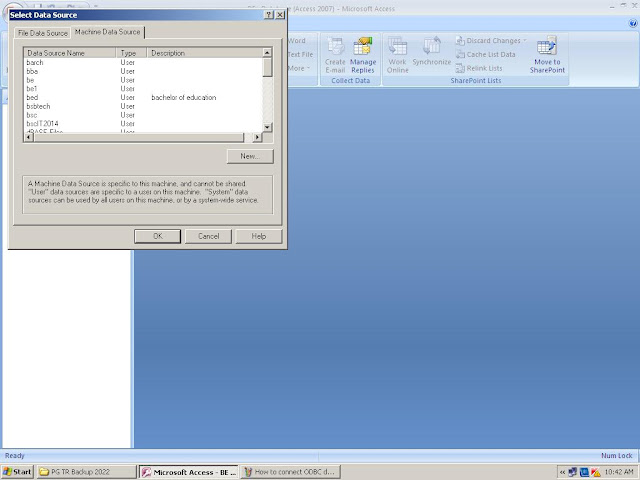
Step3: A new Popup window will appear on the screen. Click on the "Machine Data Source" tab. Here you will see the all DNS , data source names . We will select for example "BE" data source name and click OK.


Step 3 , Select Data Source Name


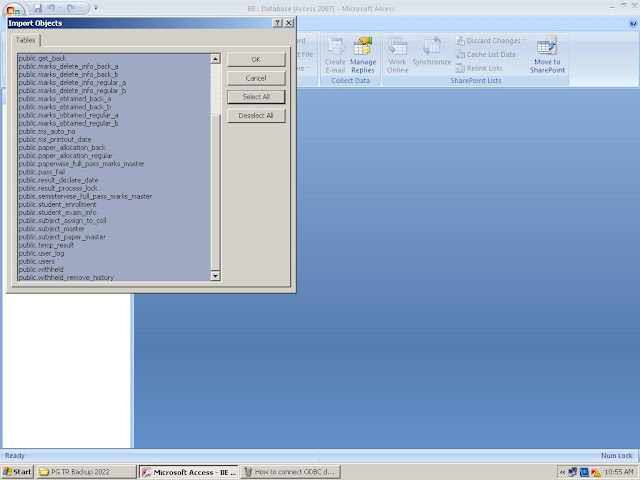
Step 4: Import Objects. In this step you will find all the tables under the BE database. Click on the SELECT ALL button to select all the tables then Press the OK.


Import Object Tables

 Step5: Get External Data- ODBC database.All objects are imported successfully. Press the button SAVE IMPORT.

Get External ODBC Data

Step 7: Your data has been successfully imported form the PostgreSQL database server to your local Windows PC's Microsoft Access Database. Enjoy !!

Successfully imported database form PostgreSQl to Local Access Database


Monday, July 25, 2022

Working Principles of the Layer 2 switch & Layer 3 switch | Network Administration

 Working Principles of the Layer 2 switch & Layer 3 manage switch  | Network Administration.

  • Switches are Layer 2 device,
  • Routers are Layer 3 device
  • The new generation of Layer 3 switches route using hardware only.
  • A switch will examine the incoming frame's MAC header to determine the physical address of the destination device.
  • Whereas a HUB , simply repeats an incoming frame out of all its ports, the switch creates a virtual path to forward frames to the port. Where it knows the destination device exist.
  • Switch can provide flow control to network traffic by temporarily storing frames in a buffer. 
  • Switch can also generate BACK PRESSURE to cause transmitting device to wait long enough for the switch to deal with backlogged traffic. To create back pressure, the switch broadcast false collation detection signals to cause network interface card to back off.
 
Layer 3 managed Switch